Pages
▼
Wednesday, June 30, 2010
StampHaven summer challenges
Here are 2 more cards that I did for the StampHaven summer challenges. We had to do a pocket card where the pocket was functional. I had just bought these little tools, so they were perfect to put in this pocket. The picnic card was fun. We had to use several images. I had this picnic paper that was great for THIS card. The challenges have been fun. I have a few more to go!
Tuesday, June 29, 2010
Summerhaven Challenges
Here are 2 more cards that I have done for the SummerHaven challenges. The flower card is for the naked stamping challenge. In other words, we were to make a card using only the base of the card and stamp directly on the card -- no layers, embellishments, nothing else!!! This was a BIG challenge for me because I just love layers and embellishments on my cards. For the truck card we were to use navy blue and make a masculine birthday card. I love using this truck because it is so versatile. These challenges have been fun AND challenging for sure!
Monday, June 28, 2010
StampHaven summer challenges
I am making cards for the StampHaven summer challenges. The jar card is for the forlorn stamp challenge. We are to use a stamp that we bought but never used. The purple card is for the punch challenge where we are to use punches. I used the MS butterfly border and corner punches and a single butterfly by Paper Studio. If you want to see the other challenges and the projects that others have done, you can click on the SummerHaven banner on the right of my blog. The challenges will continue through July 11th. Have fun looking!
Friday, June 25, 2010
Chill
I am doing the StampHaven summer challenges that will be starting tomorrow on the 26th. I am also hosting my very first challenge called Keeping it Kool. Here is a sample card for my challenge. If you would like to see all the cards for the different challenges you can click on the StampHaven banner on the right. This will be a lot of fun!
Wednesday, June 23, 2010
Bird Inchies Card
I am entering this card in a cuttlebug challenge. I have never worked with inchies before even though they were popular awhile back. SO this WAS a challenge for me!
Tuesday, June 22, 2010
Scene Cards
Sunday, June 20, 2010
Love Roses
This Bridal card is being entered in a cuttlebug challenge. I used the heart dotted swiss embossing folder as the background. I stamped the roses on gold script vellum and colored with markers on the back of the roses image.
Saturday, June 19, 2010
By the Sea
I was going through my images and came across this beautiful photo image. I only have just this one photo image and I love it. The background behind the image was made by sponging light colors of Brilliance inks onto glossy card stock. It gives off a soft shimmer, perfect for this scene.
Thursday, June 17, 2010
Victorian Shirt Card
Tuesday, June 15, 2010
Cute Crab -- Not Crabby
Monday, June 14, 2010
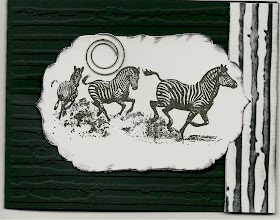
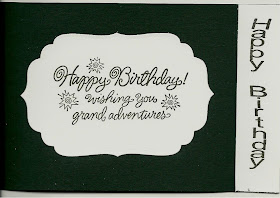
Zebra Birthday Card
Sunday, June 13, 2010
Brayer technique
I just love this background. It is so easy, but looks great. I am always reminded of a dear lady in our local stamp club that passed away a few years ago, when I use this technique. She taught it to our club. I also had to use my new stamp of the palms by Stampendous. This is how you do the brayered background.
Brayer over a multicolored stamp pad and ink the brayer well. Use 2 colors of Marvy Metallic markers and dab a few spots of the markers right on the inked brayer. Now spritz the brayer with water and brayer on white glossy card stock. You can brayer several times with the same brayer and you will get lighter and lighter backgrounds. They will all look great. This background looks great with scenic stamping.
Acrylic paint background
Here is a neat technique for a background using acrylic paints. First plop down a few blobs of paint in 2-3 different colors onto your card. Brayer over the colors once or twice. Let this dry. Then cover your brayer with bubble wrap. I used glue dots to keep it on the brayer. Pour some white paint onto a paper plate and gently roll the bubble wrapped brayer over the white paint and gently roll the brayer over one side of your first color brayered card.
On the other acrylic cards that I did below, I used felt nibs from Ranger, on my paint bottles and tapped the paint onto my stamps and stamped on my card. You will need to wash the nibs and your stamps real good when you finish. This has been a lot of fun and I hope you will try these techniques. Makes a new and neat look to your cards.
Martha Stewart punches
Friday, June 11, 2010
acrylic paint stamping
Cuttlebug acrylic paint card
Thursday, June 10, 2010
New blog!
Hi,
My name is April and I have just started this new blog. I am so excited! I will be uploading handmade card samples soon. Thanks for looking and I hope to see you again soon.
April