Pages

Tuesday, April 30, 2013

Sparkle N Sprinkle Sketch Challenge

Hi Everyone! Another month has flown by and it is time for a new sketch challenge at Sparkle N Sprinkle! The sketch is actually a picture inspiration. Aren't these warm, beautiful colors?

Color Challenge

 Color swatch courtesy of Design Seeds®.


For my card for the challenge I used these cute cats from the Cats stamp set 231.  I have had my two cats for about a year and a half now and they keep me entertained with their lively antics. I never knew cats could be such fun. I used Sparkling Sands Sparkle N Soft for the cats' fur. At least they won't be shedding like my cats are here at home! LOL! You can click here to see instructions on how I made this card.

 I have been enjoying seeing all the wonderful creations that everyone has been making for the challenges so far! Join us to have a chance of winning a stamp set of your choice. Also if you use a Sparkle N Sprinkle stamp or digi, you will receive a free digital stamp!

Thanks so much for stopping by. Have a wonderful day!

Monday, April 29, 2013

Technique Tuesday -- Bleeding Tissues Part 2


Hi Everyone! Have you ever seen something and said, "why didn't I think of that?"  Well, this is why I have called my technique today -- Bleeding Tissues Part 2.  Back in the Fall I did a technique at Sparkle N Sprinkle on bleeding tissues where I just tore the tissue paper and layered the pieces to form a background. Today I am showing a little twist on that. I think you will like this new twist. I also used our new Bird Song stamp set on my card. I love birds, so this is one of my favorite sets!


Supplies needed:
  1. white glossy card stock
  2. flower dies
  3. various colors of bleeding tissue papers ( the colors bleed when wet )
  4. water spritzer
  5. heat tool
First cut out the flowers from the tissue paper using flower dies. This time I am using cut out shapes instead of tearing the tissue paper in pieces.


Lay a the flowers one at a time on the glossy card stock and spritz the flowers once or twice. Let them dry a little and finish drying using a heat tool. The flowers will lift right off.


Now you will have a bright flower background.


I also experimented using watercolor paper and regular card stock. They each gave a different look. On the watercolor paper the flowers are more subtle and would make a nice soft background.


Here is the background on regular card stock. It really turned out interesting with some outlines around the flowers.


I hope you will do some experimenting of your own with this technique. I had never thought of cutting out shapes first. I know this would look great using leaves and Fall colors for a Fall card.  There are many possibilities! I decided to use the bright background on the glossy card stock for my card above. Thanks for stopping by. I hope you have a wonderful day!

April

Sparkle N Sprinkle supplies used:
  1. Bird Song stamp set 496
  2. Brushable Glue 540
  3. Black Ice glitter G1020

Friday, April 26, 2013

Friends

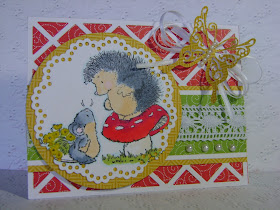
Hello and welcome to my blog. I hope you are enjoying your day. Aren't these cute little friends? I am so thankful for all my wonderful friends that God has sent my way. I am truly blessed! I am entering this card into a few challenges, one of which was really a challenge! At Joan's Gardens we were to use things on our card that would relate to each letter of the word TULIPS. The letter U was a hard one! Here is what I came up with.

T -- trellis
U -- up, the butterfly is flying UP and away
L -- lace
I  -- item from Joan's Gardens -- Spellbinders sm. circle die
P -- pearls                                   Cheery Lynn Exotic Butterfly die
S -- scallop circle, swirl paper


Thanks for stopping by. Have a great day!

Challenges entered:

Joan's Gardens  --  Tulips
Simon Says --  Color
Penny Black  --  Card Sketch


Monday, April 22, 2013

Technique Tuesday -- Metallic Acetate


Hi Everyone! It is time for Technique Tuesday once again at Sparkle N Sprinkle! Today I want to show you a striking background technique using acetate, an embossing folder and metallic markers! Here is the card I made with the background.


Supplies needed:
  1. acetate
  2. embossing folder with large designs
  3. metallic markers ( I used Marvy )
  4. white gel pen
  5. black glossy or matte card stock ( I used glossy )
Place the piece of acetate in the embossing folder and run through an embossing machine.


Turn over the embossed acetate and color in the indented areas with the metallic markers. You may want to try different brands. They will need to be opaque. Another crafter said that they used Crayola metallic markers and that they did well.  Now go in and use the white gel pen in outline and dotted areas. You can sort of see the white in the picture.


Turn the acetate over and adhere it to the black card stock. See how the colors pop? That is all it is to it! I hope you enjoy trying this technique. Have fun!


Thanks for stopping by and have a wonderful day!

April

Sparkle N Sprinkle supplies used:
  1. Cloud Nine Velvet glitter GM2000
  2. Tear-ific Tape SAT01
  3. Bold Thank You 3402-415C

Saturday, April 20, 2013

Girly

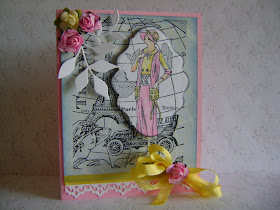
Hi Everyone! I just love making "Girly" cards. I can use flowers, bows, lace, etc. and these are the things I love. I decided to use this background stamp and then spotlight the girl using the Spellbinders Labels 20 die. Since Spring is here, I went with pastels and of course flowers, bows and a lacy border. I added leaves to the roses using the Memory Box Fresh Foliage die. The image is colored with Spectrum Noir markers. Thanks so much for stopping by. Have a great day!


Challenges entered:

Joan's Garden's  --  Girly
Simon Says  -- Background
Spectrum Noir -- Spring

Friday, April 19, 2013

Calico Cats

Hi Everyone! I hope you are enjoying your Friday. It is really rainy here. I want to show a card I made using these cute little cats from the Sparkle N Sprinkle Cats set. I joined a challenge on a stamping board where we were to use patterned paper. I love the look of paper piecing, so that is what I did with the cats. I also used patterned paper to make the rose. The Gypsy Red Velvet glitter is also courtesy of  Sparkle N Sprinkle. If you are having a dreary weekend too, I hope these kitties will put a smile on your face! Happy weekend!


Monday, April 15, 2013

Technique Tuesday -- Glitter Puzzle


Hello and welcome once again to Technique Tuesday at Sparkle N Sprinkle. I hope you are finally able to enjoy some springtime weather. We have had some lovely days here. I just had to use the new Sparkle N Sprinkle stamp set - Bird Song - on my card today. All the birds remind me of  Spring and birds are my favorite! I hope you enjoy my glittery technique this week.


Supplies needed:
  1. Sticky Paper
  2. die shape ( I used Spellbinders Labels 18 )
  3. acetate
  4. various colors of glitter ( I used Fascination, Blue Jewel, Shamrock and Autumn Medley )
  5. exacto knife
  6. cutting pad
  7. Staz On Jet Black ink pad
Cut your shape out of sticky paper using the die.


Place the shape on a cutting pad.  I used a lid from a small ink pad for the sun. With an exacto knife cut around the lid a little firmly, but not too hard to cut all the way through the sticky paper.


Next, cut wavy lines from the sun out to the edge of the shape.


Start to peel off layers one at a time to glitter. I started with the top layer.


Now that the shape is glittered, cut the shape again from a piece of acetate.


Stamp the birds onto the acetate using the Staz On ink.


If you have some areas that do not stamp well, you can use a black Sharpie pen to color them in.


It doesn't really matter, but I turned my acetate over to attach it to the glittered shape. I wanted the 2 birds in front of the sun instead of the 3. For some reason it looked better to me. LOL!


If you want you can click here to see a similar method of this technique.
Thanks so much for stopping by. I hope you will give this technique a try. Have a great day!

April

Friday, April 12, 2013

Bird Song

Happy weekend everyone! I hope you are enjoying yourself. I made some cards with a new set from Sparkle N Sprinkle. It is called Bird Song. I just love this set since birds are my favorite. I will be posting a technique on Tuesday using this set again, so be sure to check back then. Thanks for stopping by and have a wonderful day!


Monday, April 8, 2013

Technique Tuesday -- Embedded Embossing


Hello! First I would like to congratulate the winners of the Sparkle N Sprinkle April blog hop! Thanks for playing along and enjoy your prizes! Our next blog hop will be May 9-10, so I hope many of you will join in to be eligible for some fun prizes!

In the month of April we usually have a lot of rain, so I just had to use these little ducks for my card today and show you a neat technique called embedded embossing.


Supplies needed:
  1. patterned paper
  2. ink to match paper
  3. sponge
  4. clear embossing powder --  Clear Transparent EP120
  5. contrasting color of embossing powder ( I used Concord EP419 )
  6. heat tool
  7. Versa Mark ink pad 99702
First use a die and cut out a shape from the patterned paper.


Next take a sponge and sponge the ink around the die shape.


Pat the Versa Mark ink pad all over the die cut shape and add the clear embossing powder.


Heat this with a heat tool and repeat the steps above 2 more times.


Make sure you rub over the clear embossed shape with the anti static bag before you do the next step.


Ink up your stamp with Versa mark ink and stamp onto the clear embossed shape.


Pour the colored embossing powder over the stamped image, pour off excess, and heat set. This is the neat part! The image will set into the clear embossed shape. It has a different look than just stamping with ink on top of the piece. It is kind of hard to see it in a picture. You can also see that the embossing powder didn't quite cover the bottom part of the ducks, but I sort of like the effect so I didn't do it over. 


Thanks for stopping by today. I hope you will try this out and make some interesting pieces for your cards! Have a great day!

Sparkle N Sprinkle Stamps -- Swirl Ducks 3400-425E

Saturday, April 6, 2013

12 Tags of 2013 -- April

Hi Everyone! I had so much fun making this tag for Tim Holtz's 12 Tags challenge. I always enjoy trying his wonderful techniques. I really liked how the background turned out. You can see his demo by clicking here. I used several stamps from Sparkle N Sprinkle, the butterfly, script and flower. Thanks so much for stopping by and have a wonderful day!


Friday, April 5, 2013

Yellow, Black and White

First of all, if you are looking for the Sparkle N Sprinkle "Anything But a Card Blog Hop", please click here.

I had a fun time making this card with these colors. I don't think I have ever made a card with these colors before. Isn't this little House Mouse cute? I think he is having his fill of lemonade! He has put me in a "Springy" mood. Warm weather is heading our way soon and I am really looking forward to it! I hope you have a wonderful day! Thanks so much for stopping by.


Challenges entered:

Joan's Gardens -- Yellow, Black and White
Stamptacular -- Spring Fever
Spectrum Noir -- Spring
Crafty Cardmakers -- Humour

Wednesday, April 3, 2013

Anything But A Card Blog Hop

Hi Everyone! Thanks for joining the Sparkle N Sprinkle "Anything But A Card Blog Hop" that runs from April 4th through April 5th.  If you have come by way of  the very creative Cammy then you are at the right spot. If not, then you might want to begin at the Sparkle N Sprinkle blog in order to be eligible for some fun prizes. I made some scrapbook pages using the Sparkle N Sprinkle Music Backgrounds set 427, Music Labels set 424 and Music Scrap 1044-175E stamp. To see the instructions for my pages, please click here and here!


Remember to stop by each designer's blog and leave a comment to be eligible to win prizes. Your next stop is our very talented new designer, Cindy! I know you will enjoy seeing what she has created!

Monday, April 1, 2013

Technique Tuesday -- Rubber Bands and Brayer


Hi Everyone ! It is Technique Tuesday time again at Sparkle N Sprinkle! I hope you had a wonderful Easter. We have been having beautiful weather here.  I have another fun technique to show you.  I think it makes a beautiful and elegant background.  I hope you will enjoy it as much as I did.


Supplies :
  1. rubber bands
  2. brayer
  3. Versa Mark ink pad
  4. embossing powder ( I used Glisten EP135 )
  5. cream or white card stock
  6. various inks
  7. sponges
  8. heat tool
  9. tissue or paper towel

First take off the roller from the brayer and wrap several rubber bands around it. Then place the roller back on the brayer.


Roll the brayer over the Versa Mark ink pad, rolling in one direction several times to insure full coverage. Then roll the brayer over the card stock in one direction. You will need to do this about 3 times horizontally. Then add the embossing powder over it.


Shake off the embossing powder and heat set it with the heat tool.


Now roll the inked brayer 3 times in a vertical direction, add embossing powder and heat set.


Start sponging on the ink colors over the whole card stock.


Then take the darkest color of blue and sponge around the edges of the card to give more interest.


Take a tissue or paper towel and wipe it over the card stock to take off any excess ink.


Here are a few more backgrounds I made. On some of them I just went in one direction when I brayered. You also might want to try using thicker rubber bands and different embossing powders for a different look.


Thanks so much for stopping by.  Have fun playing with this technique! I hope your day is a good one!

April

Other Sparkle N Sprinkle supplies used:

  1. Waterscape glitter G1108
  2. Spring Florals stamp set 490