Hello and welcome to my blog of card crafts. I am happy that you stopped by for a visit. I hope you can visit often. Have a wonderful and blessed day! "I will praise thee; for I am fearfully and wonderfully made: marvelous are thy works; and my soul knows right well." Psalm 139:14
It seems on many blogs and challenges that there have been many Christmas in July projects, so I had to use my new Tim Holtz Hanging Sign die and make some easy Christmas cards. I really like this die.
This week for the cuttlebug challenge we were to make a card with music, dance or energy. I used the cuttlebug music score folder and the guitar stamp from Inkadinkado.
I have entered another challenge. This time it is on the Club Posh board -- Posh Impressions. We were to use 3 stamped flowers on the card -- that was the only requirement. I used a new set of Posh Impression stamps called Vertical/Spring/Summer. I love the flowers in this set.
As you might have seen, I was doing challenges for Stamp Haven for about 2 weeks. I won 3 of the challenges and have received some RAKs. We decided to post cards on the Stamp Haven site using our RAKs. Here are 2 cards that I made with mine. I used the girl image I was given and the polka dotted paper on the first card. On the second card I used the pretty paper I was given -- the rest is what I had. I tried bleaching the face of the giraffe and of COURSE it would not bleach -- grrrrrr. Sooooo I used my light green metallic pencil and it did very well. At least I used something in my stash that I haven't used in a while.
This card was made for the Christmas in July Cuttlebug challenge for Wednesday. We had a card sketch to follow and of course we needed to use cuttlebug items. I used a cuttlebug folder and the reindeer die cut.
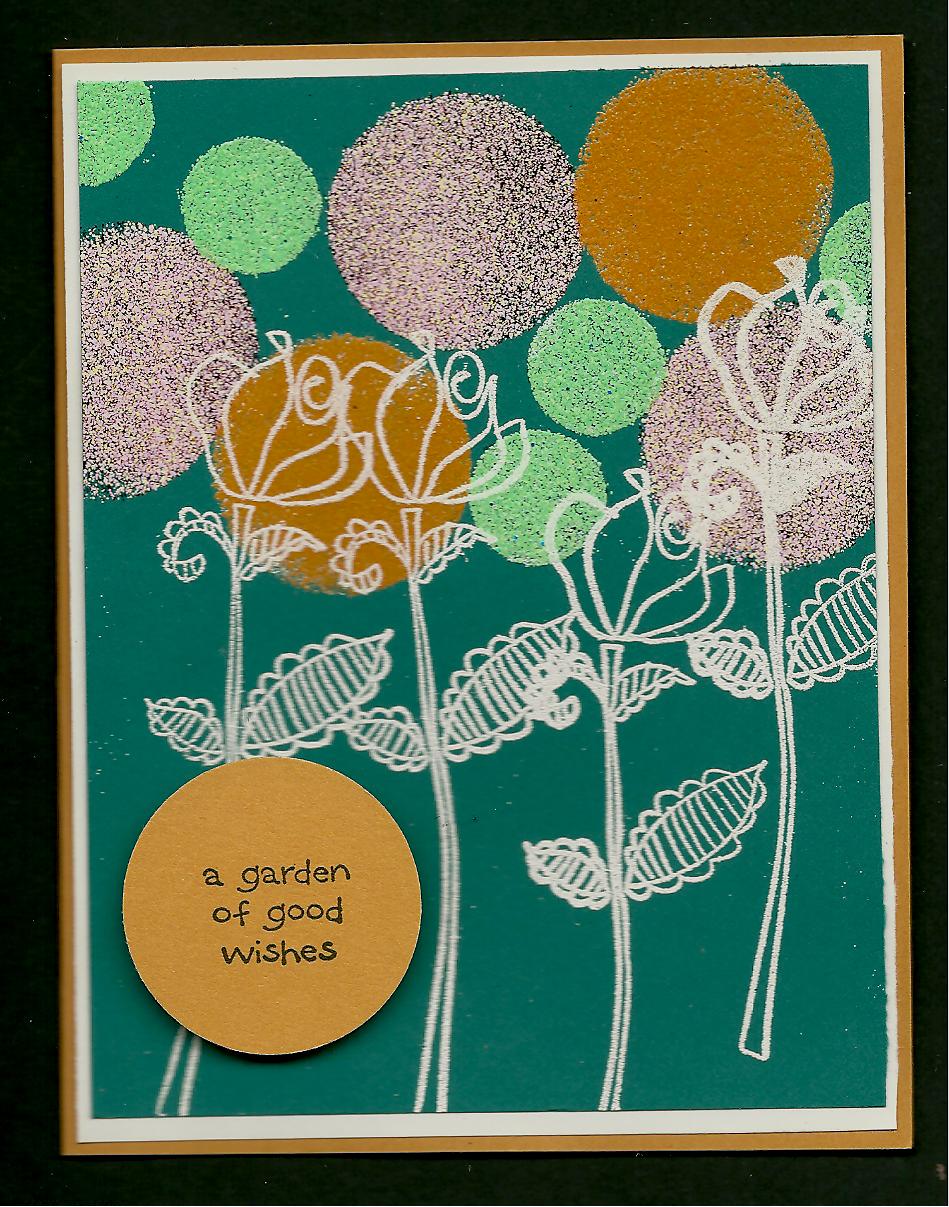
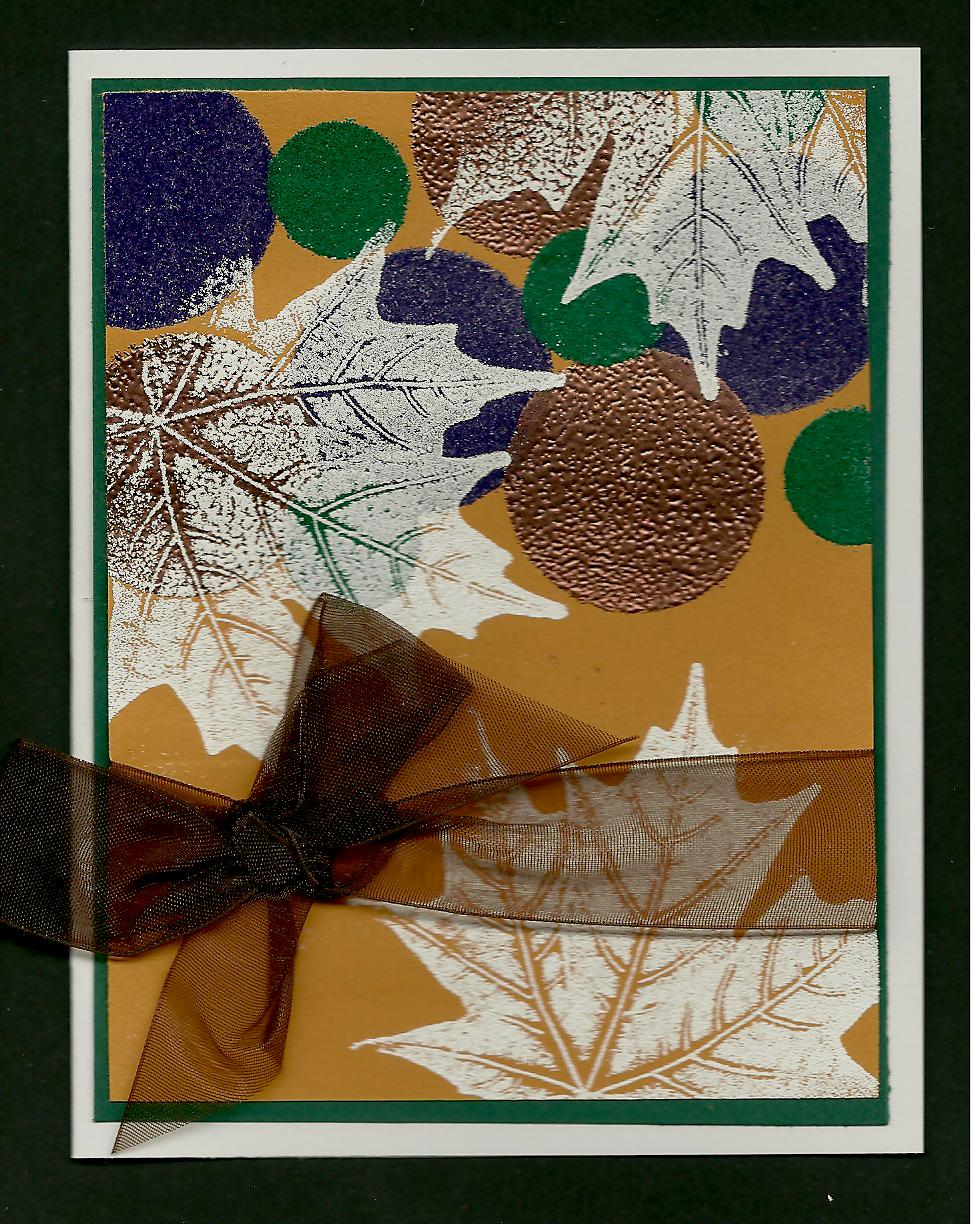
I found this technique on the Inkadinkado site. It is a Stampendous technique. I fell in love with it. This is a good way to use up your embossing powders and the look is really nice. I used 2 sizes of round sponges with a handle and inked them up with clear Versa Mark ink. You need to do each color at a time. I inked up a large sponge and stamped it 3 times at the top of my card stock and then added a color of embossing powder. I did this 2 more times using the large circle sponge and then the small one. I then stamped the roses, leaves and butterflies over top of the circles with clear ink and embossed white embossing powder. It's easy, fun and looks neat! Hope you enjoy these and try this yourself.
I am calling these cards my learning curve cards. My good friend, Bonnie, knows how hard it is for me to use the Martha Stewart corner punches to make a border all the way around a piece of card stock. Anyway, she should be proud of me because I have actually made a few and they finally turned out right! LOL! The first 2 cards are made with this technique. The last card is a spin off from a card we learned to do at the Whipper Stampers club last week. This card was shown by Ellen and I really loved it. I plan to do more of these and to also play more with the corner punches. Thanks for stopping by to take a look.
It is time for the cuttlebug challenge again! This week we are to make cards, etc. using cute critters from the garden and also use cuttlebug products. I used the swiss dot folder on the white ladybug piece and the yellow flowers are cuttlebug die cuts.
Last night we had our monthly stamp club called The Stamping Divas. We made 3 different types of gift card holders. Both my sons have birthdays in August so 2 of the holders are male oriented. The other is very frilly. I enjoyed learning how to make these. Decorating them was the fun part. Thanks to Lori for teaching us these neat holders! I have shown the front of the gift card and then with them opened. I hope you enjoy looking at them.
Talk about racking my brain! These cards were made for the SummerHaven challenge. We were to make a card set of 4 and we were to use black and white on each one, 2 different color combinations on each one, the same 3-4 stamps and same embellishments to match the colors. Whew! The colors are very bright, but my scans don't really depict that. Anyway, this is what I came up with.
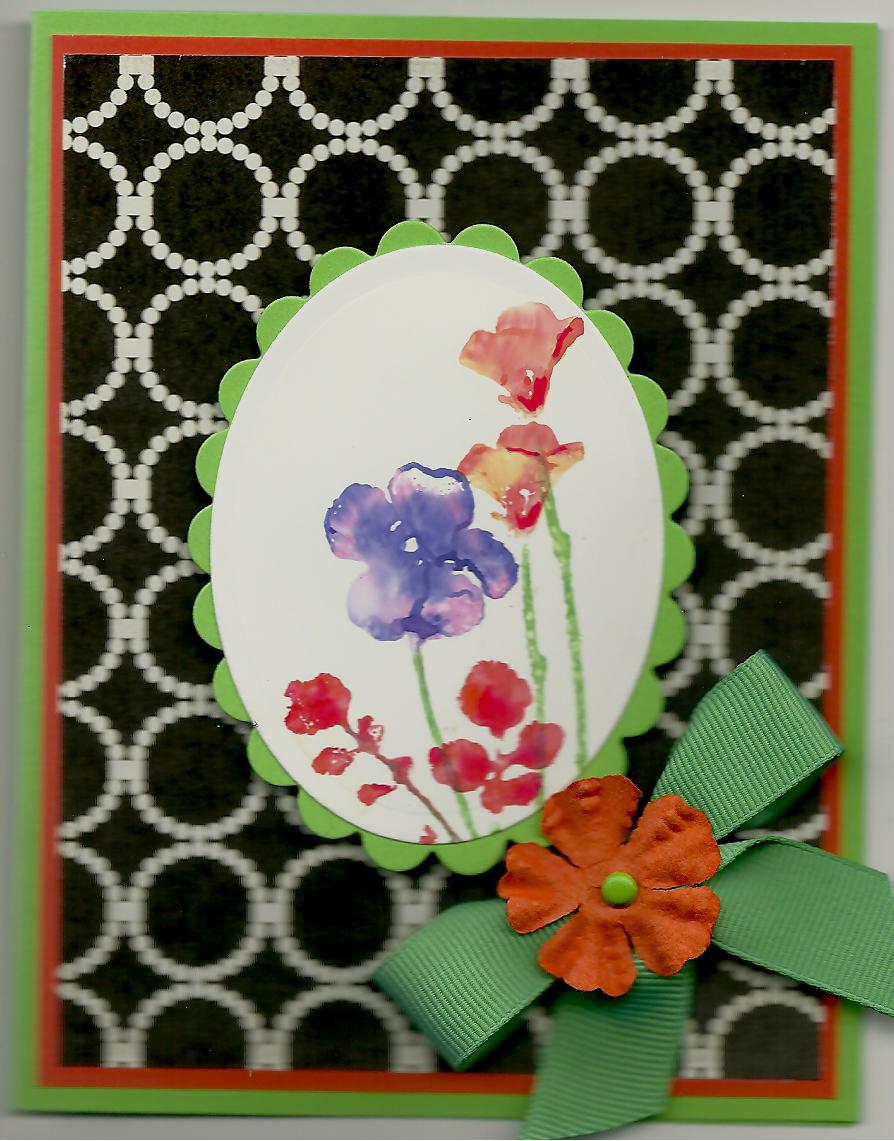
I had a friend come over and stamp yesterday. We had great fun stamping with acrylic paints and making backgrounds with the paint. I love this look and keep going back to it! I need to give credit to Lou Ann on the butterfly card, because this was her stamp design that I copied.
I am entering this card in the weekly cuttlebug challenge. We are to use lace and/or doilies on the card. Also we are to use embossing. I used one of the new cuttlebug embossing and die cut folders on the front. The rose pattern is a napkin. The flowers are from Tim Holtz new Tattered Florals dies.
Here are some cards I have done with the Mosaic Stamping technique. This was fun and it gives a neat and different look to a card. I cut some flat rubber into very small pieces and stuck them mosaic style onto a clear acrylic block with double sided tape. You can buy a flat rubber gasket at the hardware store if you do not have rubber left over from unmounted stamps. Use white or light colored card stock , stamp an image or images and color them. Ink up your mosaic block with clear Versa Mark ink and stamp this over your colored image. Then sprinkle clear embossing powder over this, shake off and emboss. Now choose a darker color of ink for the background and either brayer or sponge the color over the whole card stock. Use a tissue to wipe off excess ink. I hope you like this look and will have fun trying this technique!
I hope everyone has a happy and safe 4th! As we celebrate the holiday I trust we remember the sacrifices of so many that have kept this country of ours free and great! God bless America!