Welcome

Hello and welcome to my blog of card crafts. I am happy that you stopped by for a visit. I hope you can visit often. Have a wonderful and blessed day! "I will praise thee; for I am fearfully and wonderfully made: marvelous are thy works; and my soul knows right well." Psalm 139:14

Saturday, February 28, 2015

Always Time for Coffee

Welcome to Sparkle N Sprinkle's 
March 1, 2015 Reveal.

This month SEVEN new rubber stamp sets are being introduced.   These sets are 20% off their regular price, until March 3rd.  All the new reveal sets are available on Cling Mounted Rubber and as a digital image.  Glasses #698 is the stamp set featured in  This Month's Technique Video.

The sets are:


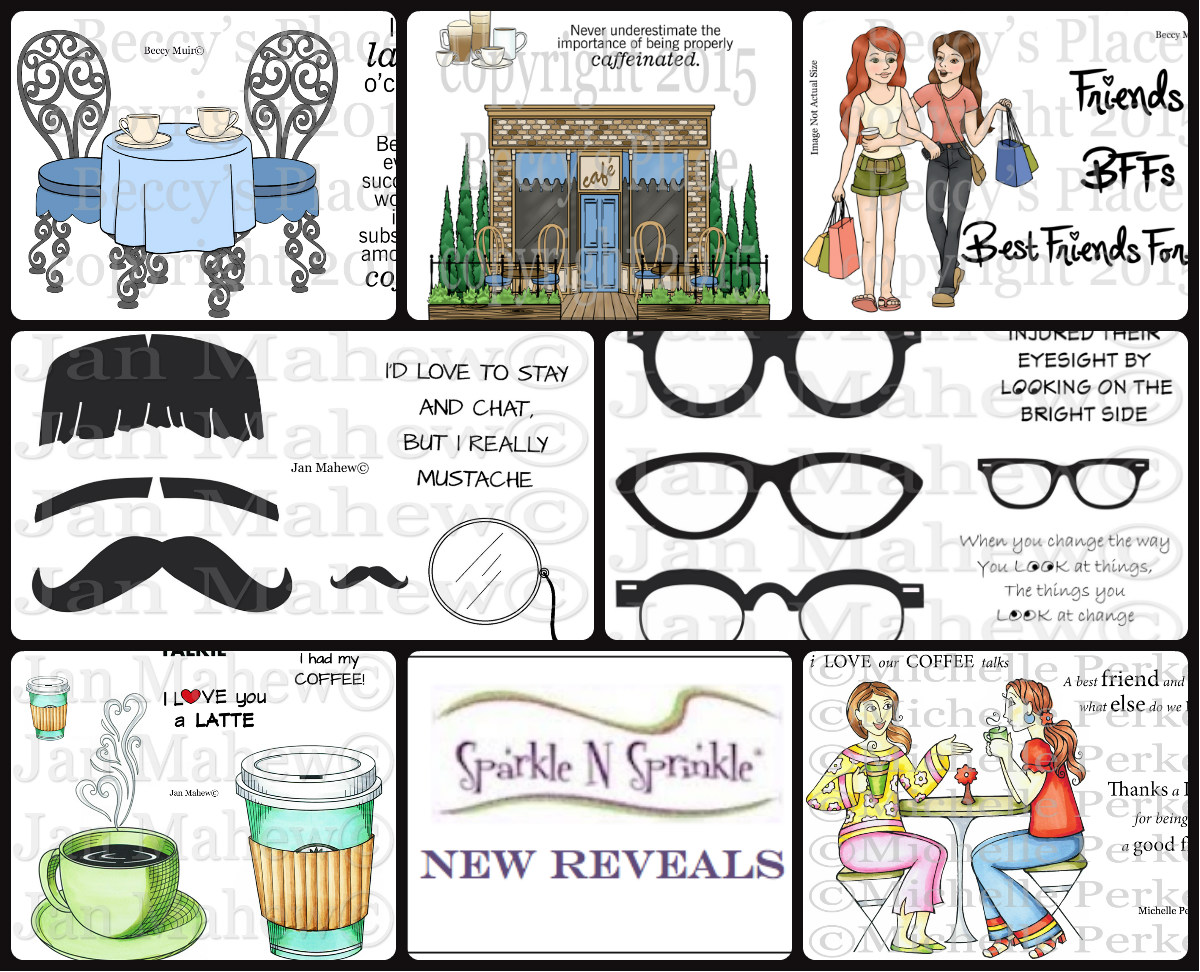
Coffee Time #694   (digi version DIGI694)
Coffee Shoppe #695   (digi version DIGI695)
Best Friends Forever #696  (digi version DIGI696)
Mustache #697   (digi version DIGI697)
Glasses #698  (digi version DIGI698)
Expresso Yourself #699  (digi version DIGI699)
Coffee Talks #700  (digi version DIGI700)

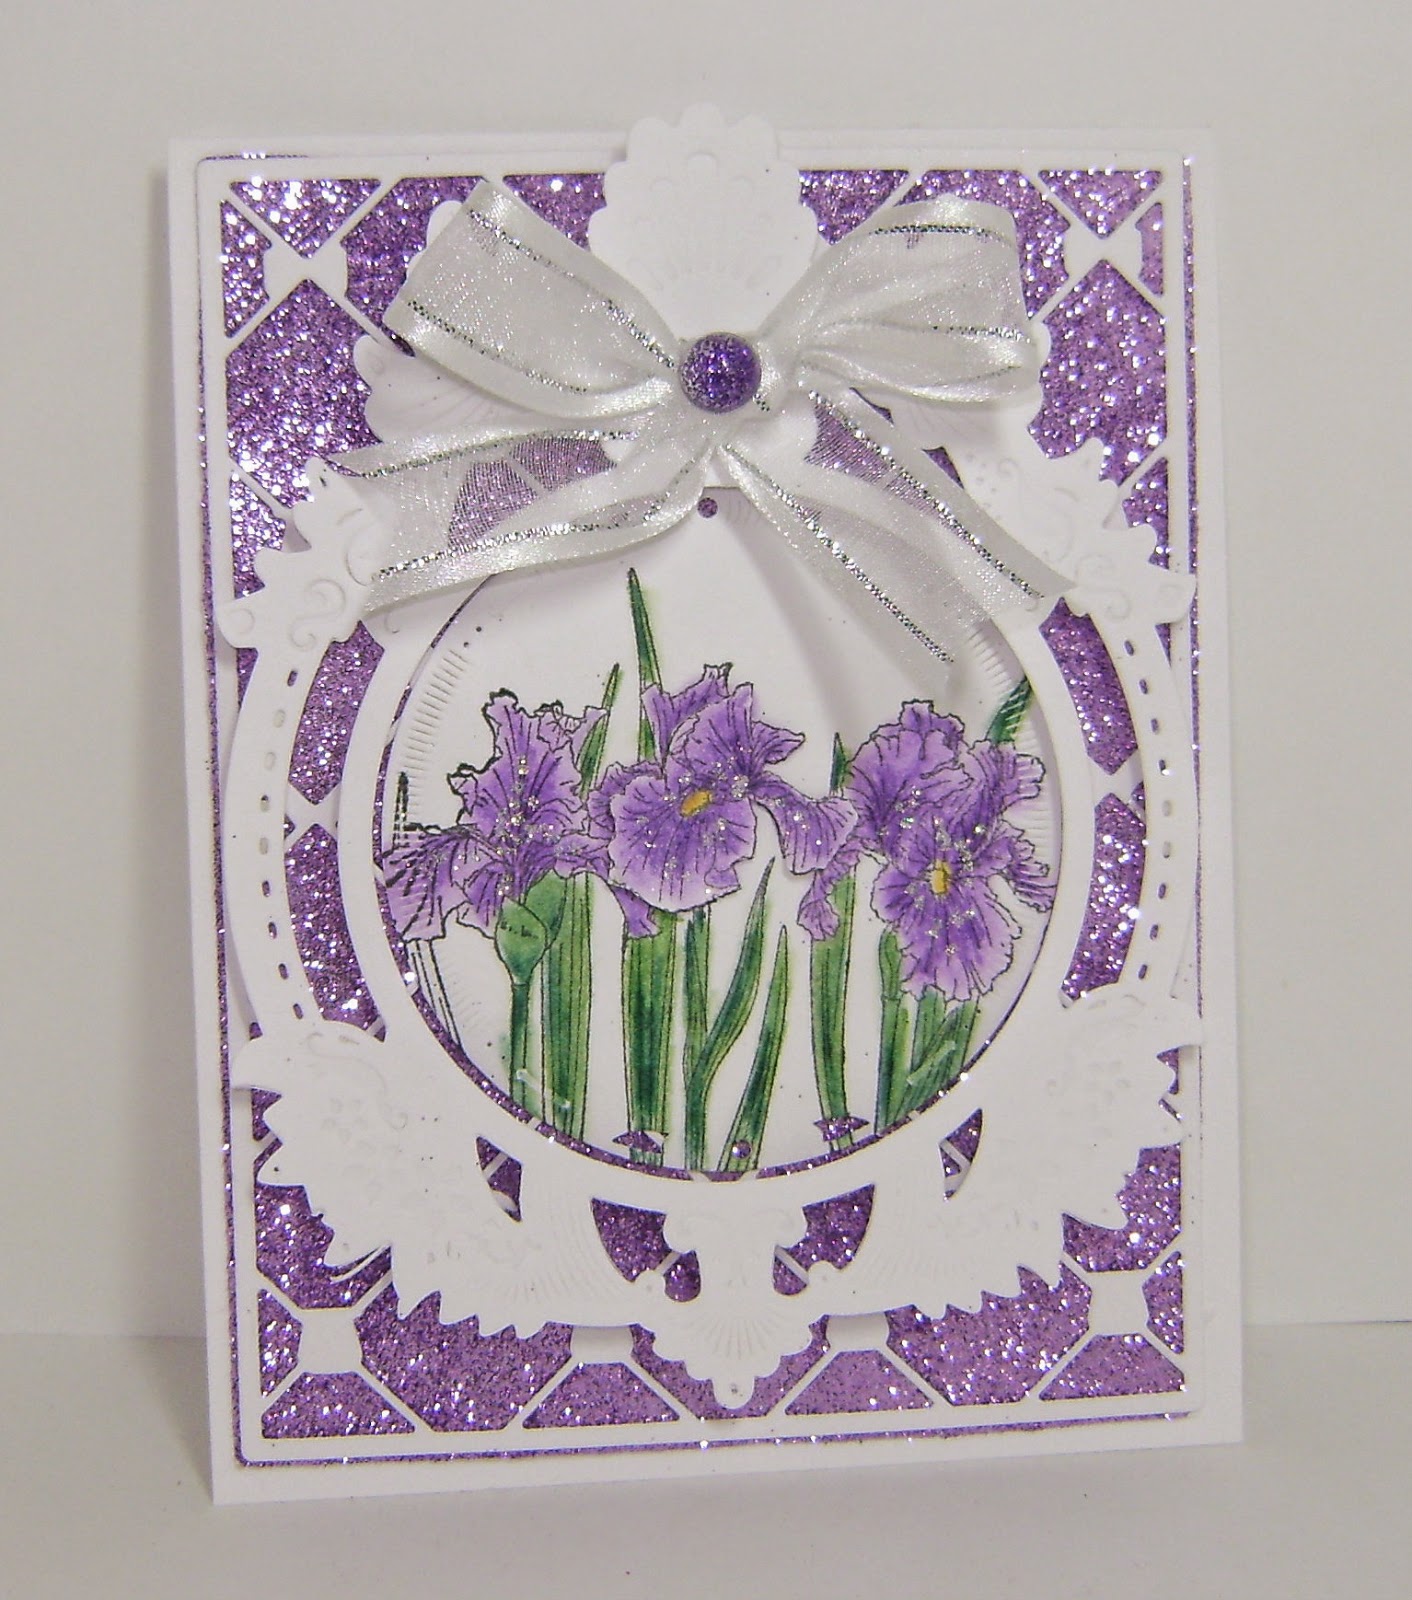
Hi Everyone and welcome to my blog! I chose to use the Coffee Shoppe stamp set 695 for my reveal today. I am looking forward in being able to sit outside a coffee shop when the weather gets warm. I am looking forward to Spring! I had this awning die from Savvy Dies that went perfect with the cafe. I "glittered" the pink stripes on the awning and curtains by using my versamarker and adding Sparkle embossing powder EP107. I also used Sparkle embossing powder on the banner.


On the flower boxes I used Copper Flame embossing powder EP453 to make them look like metal flower boxes. Flower soft was used for the flowers. On the windows I used Clear Detail embossing powder EP280.


On March 3rd,  one Grand Prize Winner will be selected from the comments left on the designers' blogs listed below.  The Grand Prize Winner will receive
all SEVEN of the new rubber stamp sets (or digi sets, if you prefer)


The winner of the blog hop will be announced on March 3 on Facebook, the SNS blog, and on our blogs.  This month's Blog Hop order is:

(Tip: if you have a problem with a particular link, try clicking on the person's blog title to send you to their Home page.)

Don't forget to leave a comment with each Designer to be eligible for the Grand Prize.  We love reading your comments and hope we have inspired you as well.  If you absolutely can not leave a comment for some reason, please email icinganne@yahoo.com with your comment and the name of the blog or Designer you are commenting about.

Thanks so much for stopping by. I hope you have a wonderful day! Now on the the very talented SHONA!


Challenges entered:

Simon Says Monday Challenge:  No Rules
Simon Says Wednesday Challenge: Anything Goes


Tuesday, February 24, 2015

Berry Delicious

Hi Everyone! Welcome to my blog. I want to show you a card I made with the Berry Sundae stamp set 688 from Sparkle N Sprinkle. I just love this set. I love ice cream, so this is right down my alley! I used Sparkle embossing powder EP107 on the stripes on the patterned paper. Winter Berry embossing powder EP411 was used on the raspberries. White Liquid Applique was used for the whipped cream. Sparkling Snow glitter G1003 was sprinkled over the "ice cream."


I used an embossing folder for the background behind the ice cream bowl, cut out a window using a die cut and popped up the piece over the bowl. Diamond Glaze was used on the bowl to make it look like glass. Corner dies were used to dress up the corners of the card.


Thanks so much for stopping by. I hope your day is as yummy as ice cream!


Challenges entered:

Simon Says Monday Challenge:  No Rules
Simon Says Wednesday Challenge:  Add a Little Texture
Top Tip Tuesday:  Rubber Stamps Only (TIP)  --  If you want glitter paper and do not have any, use a Versamarker to color in the places where you want sparkle, like I did on the stripes. Add clear sparkle embossing powder and heat set. Now you have glitter paper!

Thursday, February 19, 2015

Oldies Technique #3 -- Crayon Resist

Hi Everyone! Welcome back to the Oldies techniques that I will be showing every first and third Thursdays of each month. I want to show you an easy one today called Crayon Resist. I like how it adds a little pizazz to a project.


Here are the supplies you will need:

white glossy card stock
black permanent ink
crayon  (any color)
solid stamp
paper towel
dye based inks
sponge or brayer


Stamp your image on the glossy card stock using permanent black ink.


Take your crayon and color around the edges of the image. This stamp is great for doing this since it already has a border around the edges of the swirls. A lot of people think that you have to use a white crayon, but any color works because it is the wax that resists and then will be wiped off to leave white around the edges. I like using a color so that I can see where I am coloring.


Here is a closer look so you can see some of the pink around the edges.


Now take your sponge and sponge colors randomly over the whole card stock.


Next take the paper towel to wipe off any extra ink and you see the white border around the image.


On this piece I stamped and colored inside the butterfly with my crayon.


You can also highlight areas of the image to look like light is hitting it. I used my crayon on certain areas of this image, using a thin line of color.


I hope you enjoyed the technique today. Come back for another Oldie on March 5th!

Thanks so much for stopping by and have a great day!


Friday, February 13, 2015

Happy Valentine's Day

Hi Everyone! I hope you are enjoying your day. Here is a tag I made for Valentine's Day. I love working with collage although I don't do a lot of it. My tag is a mix of papers, washi tape and embellishments.


I hope you have a wonderful Valentine's Day. 

Challenges entered:

Simon Says Monday Challenge:  Red + Pink


Beautiful Blooms

Hi Everyone! I hope you are having a good day. The winter chill has really settled in, but I am thinking ahead to Spring and all the lovely flowers. Here is a card I made with one of Our Daily Bread stamps. I always need birthday cards so this was a great stamp for that.


I made the flowers using coffee filters, Tim Holtz's Tattered Flowers die and Distress Stains.  


Thanks so much for stopping by. Have a great day!

Challenges entered:

Frilly & Funkie:  Winter Blooms
Our Daily Bread:  Sketch

Tuesday, February 10, 2015

Still Thinking of Spring

Hi Everyone! I hope you are having a good day. Awhile back I showed a card that had the title "Thinking of Spring", well I am still thinking of Spring! I want to show you a card I made with Sparkle N Sprinkle's new stamp set Iris Garden 687. When I taught school some of my children would bring me irises in the Spring. They smelled so good sitting on my desk.


I used the Die-Versions Gents Background die on a Super Adhesive sheet and then added Lacy Lilac glitter G1033 to it for the background. I loved using the Spellbinders Gold Majesty Circle die that I pop dotted in the center. I colored the irises using colored pencils and Gamsol and added Sparkling Snow glitter G1003 to them for dew drops. 


Thanks so much for stopping by. I hope you have a great day!

April


Challenges entered:

Scrapy Land:  Anything Goes
Simon Says Wednesday Challenge: All Things bright and Beautiful


Thursday, February 5, 2015

Oldies Technique #2 -- Chalk Popping

Hi Everyone! Welcome to my Oldies technique #2 -- chalk popping. It has been a very long time since I have used this technique. I really like the softness of the look.


The supplies you will need are:

Versa Mark ink pad
chalks and applicator
solid or bold outline stamp
card stock


Stamp the image on the card stock using Versa Mark ink.


The image does not show up.


Now start chalking over the image using small round motions. I found that one brand of my chalks did not work well, so you might need to try another if you are having problems with blotches. The applicator may have a play in it too. My second set of chalks had small cotton balls to apply the chalk with and it worked much better. I started off with a light hand and then went back and added more color until I got the look I wanted. 


This is such an easy technique and gives a soft look to your cards. I hope you will have fun trying this.

Have a wonderful and blessed day.

April
  

Challenges entered:

Simon Says Wednesday Challenge:  All Things Bright and Beautiful
Top Tip Tuesday:  Favorite Color Combo (love pink, black and white together)

 TIP:  To make a soft image use the easy chalk popping technique above.


Blog Archive