Welcome

Hello and welcome to my blog of card crafts. I am happy that you stopped by for a visit. I hope you can visit often. Have a wonderful and blessed day! "I will praise thee; for I am fearfully and wonderfully made: marvelous are thy works; and my soul knows right well." Psalm 139:14
Showing posts with label Sizzix dies. Show all posts

Monday, January 8, 2018

Shabby Chic #1

Hi Everyone! Happy New Year! One of my crafting goals this year is to make more shabby chic cards. I love this look and I hope to get better at it as time goes on AND that only comes with practice! I also plan on using up a lot of my scraps, so these will be scrap cards as well. On the second and fourth Tuesday of each month I plan on posting a shabby chic card I have made. Here is my first one!


I found the bird image in my stash, colored it with Spectrum Noir alcohol markers and cut it out using the Spellbinder Small Circle die. I sponged the edges with brown ink. I used a new stencil a secret Santa sent me and applied clear sparkle embossing paste in the left corner. The trees are Sizzix dies left over from making some Christmas cards. I found the pine cone in my stash and added it to the bow. I punched the greenery using a Tim Holtz punch. The edges of the strip of patterned paper was roughed up by using the Tim Holtz distress tool. 

Thanks so much for stopping by. Haved a wonderful New Year!

Challenges entered:

Frilly and Funkie:  Three Is Not a Crowd ( 3 trees )
One Crazy Stamper:  Anything Goes - With a Twist ( blue and ribbon)
Simon Says Monday Challenge:  Winter Blues
Simon Says Wednesday Challenge:  Something New ( stencil )

Wednesday, March 15, 2017

Bits and Bobs #6

Hi and welcome to my blog. I am showing another bits and bobs card today. I am hoping to whittle down my stash of supplies but I think it might take a lifetime! LOL!  I hope I make a small dent anyway.


I came across a jar of Paper Perfect. I don't ever remember buying it OR using it, but I must have since about a third of is gone!  I spread the paste on a piece of plastic and let it dry over night. To make a bumpier texture I patted it with my palette knife.


After it dried I just peeled it off the plastic. The top looks like handmade paper and the bottom looks smooth and plastic like.


Next I decided to cut flowers and leaves from this "paper."  It did no cut through using my dies, so I had to finish cutting them out with my scissors. I then colored them using Spectrum Noir markers. I found that alcohol markers work better than anything else.


I found the lady image in my stash and I colored her using colored pencils and Gamsol. The patterned paper was a scrap and I found the ribbon in a batch I had dyed awhile back. I used a border punch at the bottom of the card.


Thanks so much for stopping by. Have a wonderful and blessed day!

Challenges entered:

Inspiration Destination:  Anything Goes #124
Simon Says Monday Challenge:  Handmade Flowers


Friday, January 6, 2017

Vintage Flowers

Hi and welcome to my blog! Of course all my flowers are gone except for my pansies, but I am showing a flower card I made today from this picture inspiration from Altenew. Aren't these lovely flowers and colors?  These flowers look like snow and we have snow in the forecast today!


Here is my card. I used the Altenew Vintage Flowers set and stamped the flowers with white pigment ink. The ink tends to soak into the card stock so I colored over the flowers again with a white colored pencil. I used Gold Liquid Pearls for the flower centers.


The saying came from the Altenew layered Lily set. I embossed the saying with gold embossing powder and outlined the "thanks" with a black marker.

I flicked some gold metallic paint across the card for interest and then added the bow and butterfly. The twig was outlined with a gold metallic marker.


Thanks so much for stopping by. I hope you are enjoying the new year so far!

Challenge entered:

Altenew:  Inspiration


Wednesday, October 5, 2016

Altered Dies #19

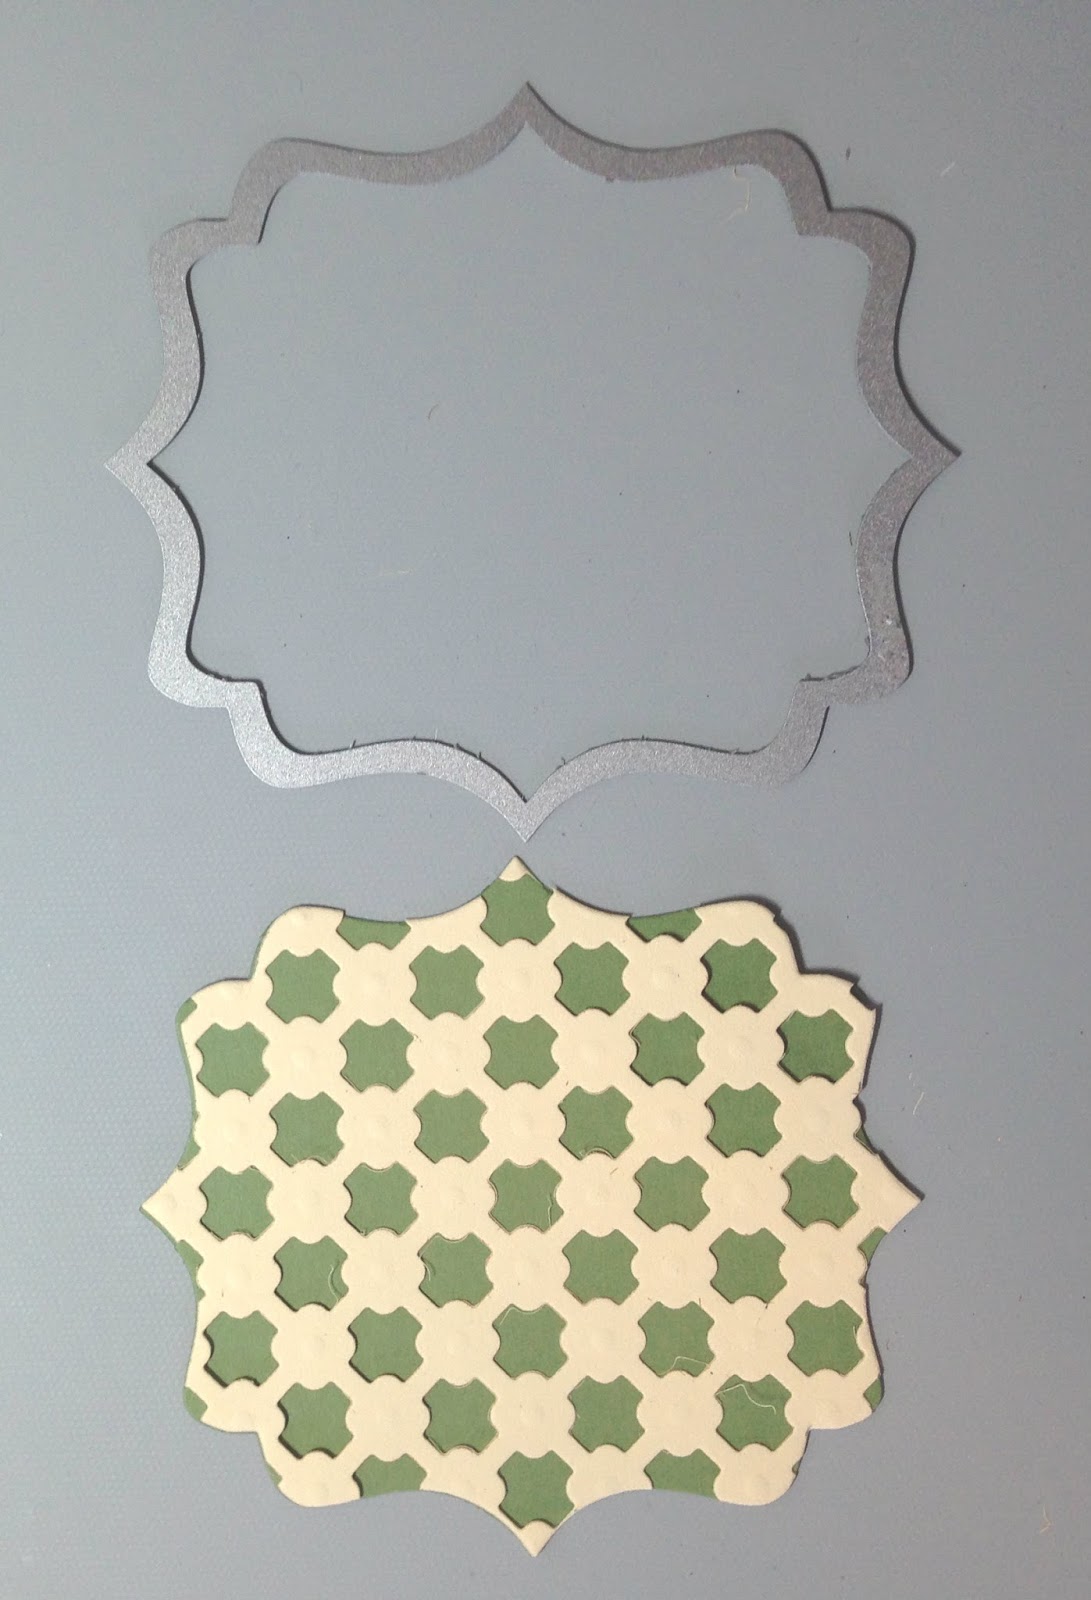
Hi Everyone. I hope you are enjoying your day. I have another altered die card to show you. I love using die shapes on my cards and here is an easy way to dress them up a bit. I started with the Crisscross Spellbinders background die, adhered it over green card stock and cut it out all at once using the Sizzix Fancy Labels die. Now I have a fancy look to my shape!


Step 1.


Step 2.


Here is the card!


Thanks so much for stopping by. I hope you enjoyed this simple way to add flair to your die shapes!

Challenges entered:

ABC Challenge: Q = Quick
Great Impressions:  Anything Goes

Wednesday, May 4, 2016

Altered Dies #9

Hi Everyone! I have another altered die card to show you today. You might remember that I showed this card a few months ago. I entered it into some challenges then, but today I want to show you how I altered the die on it.


I started with this Cheery Lynn Lattice Valance die and cut off each end.


I added Sparkle N Sprinkle's  Blackened Bronze embossing powder to it and turned it upside down to make it look like the top of an iron gate!

I hope you enjoyed seeing how the gate was made using this valance die. Thanks for stopping by and have a great day!


Friday, April 1, 2016

Have a Very Mice Day!

Happy April Fool's Day! I hope you won't get fooled too much today. I want to share a card I made using acetate. I always love to see cards made with acetate but I have not made many myself. I enjoyed very much making this card! Here is the card when it is closed.


I embossed the acetate using a Sizzix frame embossing folder. I stamped the mouse image onto white card stock and cut him out using the Gina Marie stitched circle die. The mouse was colored using Spectrum Noir markers. I added Sparkle translucent embossing powder ( courtesy of Sparkle N Sprinkle ) on the pink flower. The lace corners are from Cheery Lynn and the butterflies are from Tim Holtz's Butterfly Frenzy die.


Here is the card slightly opened so that you can see the acetate front better.


This is the inside of the card. I used light teal card stock and placed a sea grass stencil from Tattered Angels over it and sprayed Dragonfly Glimmer Mist over it. The saying I had was long, but I needed to fit it on the circle, so I inked the saying half way and stamped it on top and then inked the stamped on the other half of the saying and stamped it underneath.


Thanks so much for stopping by and I hope you have a very MICE day! LOL!


Challenges entered:

Cheery Lynn:  Back to Nature
House Mouse and Friends:  Stencils
Simon Says Monday Challenge:  We Can See Clearly
Simon Says Wednesday Challenge:  Anything Goes


Wednesday, March 16, 2016

Altered Dies #6

Hi and welcome back to Altered Dies #6! I have had so much fun with these altered dies. I do not have a hot air balloon die so I looked through my dies to see how I could make one. Here are the steps below.


I started with these 2 dies -- Spellbinders Birdcage 1 and the smallest Fleur de Lis Rectangle.


I snipped off the top of the birdcage with scissors.


I wanted the "basket" of the balloon to have more texture like a basket so I used the Spellbinders die Raindrops On Roses made for Heartfelt Creations.


I used glue stick to glue the die over the rectangle so that I could cut around it easily.


Here is a close up of the card to see the texture on the basket better.


I hope you enjoyed seeing how I made this hot air balloon. Thanks for stopping by and have a wonderful and blessed day!

Challenges entered:

Our Crafty Corner:  Anything Goes
Simon Says Wednesday Challenge:  Cute and Cuddly

Thursday, March 10, 2016

Rustic Bunny

Hi Everyone! Welcome to my blog. I want to share a tag I made using a Sizzix bunny die. At first I was going to use the negative cut of the bunny but to me it looked like a warped mushroom! LOL! So instead I used the cut out of him. I cut him from a cardboard lid, peeled off some of the top layer to show some ridges. I swiped over the ridges using a Distress Black Soot ink pad. I also sprayed some Pewter Distress ink on him. Last I used Tim Holtz Speckles stencil to add some spots to the bunny. I made the background using Tim Holtz Alteration Collection dies and following this technique here. I added butterflies to the tag using Tim Holtz Butterfly Frenzy dies.


Thanks so much for stopping by. Have a great day!


Challenges entered:

Love 2 Create:  Challenge #5
Simon Says Monday Challenge:  Make Your Own Background
Tim Holtz 12 Tags of 2016:  March

Saturday, February 20, 2016

Split Panel Card

Hi Everyone! I want to show you a card I made using several techniques. This is a split panel card where I stamped Hero Arts A Real Wild Poppy stamp on one panel repeated times. I used a dot Stampin' Up stamp around the flowers. I used Versa Mark ink to stamp, added clear embossing powder and heat set it. I then sponged on Broken China, Bundled Sage and Tea Dye Distress inks. The embossing powder acted as a resist. I then cut the panel into three parts, made them different heights to add interest and added a brown border of card stock to each panel. I also dyed some seam binding to match the card. The butterflies were cut from patterned paper using Tim Holtz's Butterfly Frenzy die.


             Thanks so much for stopping by. I hope you have a great day! God bless!


Challenges entered:

Hero Arts:  Fabulous Flowers
Scrapy Land:  Tie One On


Saturday, January 30, 2016

Flower Garden

Hi Everyone! Welcome to my blog. I hope you are enjoying your day. I made a card with a stamp that I have not used in awhile. It is the Colonial Spring stamp from Impression Obsession K1006. I stamped it on glossy card stock using Jet Black Staz On ink. Then I used Rub On's to color the scene.  I added yellow and red flower soft to the flowers. Part of the Cheery Lynn Lattice Valance Border die was used at the bottom of the card. I used Blackened Bronze embossing powder from Sparkle N Sprinkle to make it look like an iron gate.


Thanks so much for stopping by. Have a wonderful and blessed day!


Challenges entered: 

Cheery Lynn:  Anything Goes/Dies
Crafty Card Makers:  Punches and/or Dies
Frilly and Funkie:  Enjoy Your Embossing
Impression Obsession:  Flower Power
Simon Says Wednesday Challenge:  Anything Goes


Wednesday, January 6, 2016

Altered Dies #1

Hi Everyone! I hope you are having a good day! This is the first of the series I will be doing on altered dies. I will be be doing this series on the first and third Thursdays of each month. I hope you will be inspired by my project today. I have been going through my dies and seeing NEW ways I can use them. I used three different dies and altered them on this card.


I started with my NEW Sizzix Tea Time die and the Cheery Lynn Lattice die shown here.


Next I cut the lattice using the Tea Time die for it to look like this.


I patted Versa Mark ink over the lattice shape, sprinkled on Sparkle embossing powder from Sparkle N Sprinkle and heat set it. I then cut off the handle on the teacup and adhered the lattice shape over the cup for it to look like snow blocks of an igloo and then I cut an opening for a door.


I also added White Liquid Applique and Sparkle N Sprinkle Waterscape glitter to the bottom for "snow."


Next I used this Spellbinders Bracket Border die for my snow banks. I cut three of these, turned them upside down and glued them together.


The saying on the card is from Sparkle N Sprinkle and the penguin is a Fiskars stamp.


I hope this has inspired you to look at your dies differently. Thanks for stopping by. Have a great day!


Challenges entered:

Dies R Us:  Something New
Scrapy Land:  Anything Goes
Simon Says Wednesday Challenge:  Something New


Wednesday, December 16, 2015

Cardinal and Tree

Hi Everyone! Do you have your Christmas shopping done yet? How about those Christmas cards?  This season has been real busy for me, but I am enjoying it. I hope you are too. Today I want to share an easy Christmas card I made.


I used a Martha Stewart deep border punch on the side. The green background paper came with the embossed design. The tree was cut from some patterned paper using a Sizzix die. I stamped and colored the cardinal and fussy cut him and pop dotted him to the card. My extra "pinch" was adding the sticker pine cone and greenery to the branch!

Thanks so much for stopping by! Have a wonderful day!


Challenges entered:


Simon Says Monday Challenge:  Just A Pinch
Simon Says Wednesday Challenge:  Die Crazy


Wednesday, November 18, 2015

Oldies Technique #21 -- Pear Ex Powders

Hi Everyone! Welcome back to another Oldies technique. I pulled out my Pearl Ex powders to play with and here is the result. I have not used these in ages! I also have some Powdered Pearls that are similar to the Pearl Ex and used one of those too. I love the shimmer these powders give. I hope you enjoy this technique today.


Here are the supplies you will need:

Pearl Ex or Powdered Pearls  ( I used a white, light green and light blue )
Versa Mark ink
dark card stock
small paint brush
tissue or soft cloth


First I took a background stamp and inked it up with Versa Mark ink. You can see I have used this stamp a lot! LOL!


Next I laid my card stock over the background stamp and rubbed my fingers over it to get a good impression. I do this a lot with my background stamps in order to let the ink soak in better and to give an even look.


Now start to add the different colors of  powders to the background using the paint brush. The powders will stick to the ink. I just added color randomly. It looks real messy at this point.


Next take a tissue or soft cloth and wipe off the excess powder and you will have a wonderful, shimmery background!


This is so easy, but beautiful. Thanks for stopping by and have a great day!

Challenges entered:

Scrapy Land:  Monochromatic ( dies used -- sizzix tree )
Simon Says Wednesday Challenge:  Christmas


Thursday, September 24, 2015

Oh Christmas Tree

Hello and welcome to my blog. I am happy you stopped by today! I want to show you a Christmas card I made using the Christmas tree stamp from the Just Believe stamp set by Stamper's Anonymous. I made my own background by using a gingham background stamp, stamping with Fired Brick Distress ink and stamping on kraft card stock.


The theme for my Christmas tree at my house is "outdoors". I have all kinds of animals and outdoor ornaments on my tree. For this tree on my card I added White Liquid Applique to the branches along with Clear Rock Candy Distress glitter to add sparkle.


To add some interest to the deer I used a snowflake embossing folder.


Thanks so much for stopping by. I hope you have a wonderful day!

Challenges entered:

ABC Christmas:  S is for Silent
Crafty Hazelnut's Christmas Challenge Extra:  Anything Goes/Christmas
Simon Says Wednesday Challenge: No Designer Paper
Sweet Stampin':  Emboss It
The 12 Months of Christmas: Oh Christmas Tree


Thursday, September 3, 2015

Oldies Technique #16 -- Gold Leaf

Hello and welcome to my blog. I am sharing another Oldies technique today. I have not used this product in ages but it is so pretty! I need to use it more! Gold Leaf is gold that has been pounded into a very thin sheet. You can purchase gold leaf flakes from various stamp companies. I have also seen it at Hobby Lobby and Michael's. I will be using these flakes on my cards today. I will be showing 2 different ways to use gold leaf on your cards.


For the first method you will need these supplies:


gold leaf flakes
double sided sticky paper
die ( I used Spellbinder's Fantastic Flourish 2 )
stiff brush
card stock ( I used cream)
paper to catch left over flakes


Use the die to cut from the double sided sticky paper. Peel off the back layer and adhere it to your card.


Peel off the top layer and start adding on the gold leaf flakes.


Pat down the gold leaf flakes and burnish with your fingers until all the flakes are flat.


Now take the stiff brush and brush over the image to get any other small gold leaf pieces off.


Here is the finished piece! I love the variegated  colors and shine.


I cut a small piece of double sided sticky paper and added more gold leaf flakes to it and added this piece behind a die cut window to look like stained glass.


Here is the second method. 


Supplies you will need:

gold leaf flakes
glue stamp pad ( I used the glue pad from Tsukineko )
stamp
card stock ( I used dark brown )
stiff brush


Gold leaf shows up so nicely on dark card stock, so on this card I used dark brown. Stamp your image using the glue ink pad and stamp onto the dark card stock. Make sure you wash off your stamp quickly.


Sprinkle the gold leaf flakes over the image pat, burnish and brush as was shown above!


Thanks for stopping by. Have a wonderful and blessed day!

  Dies used:  

First card:

Fantastic Flourish -- Spellbinders
Stained Glass Vitrail -- Spellbinders
Bird die from Sizzix I Love You Stamp set

Second card:

Beaded Oval -- Spellbinders


Challenges entered:

Artistic Stamper:  Things With Wings
Chocolate, Coffee and Cards:  Fancy and Feminine
Crafting From the Heart:  Anything Goes #75
Scrapy Land:  Anything Goes/ die
We Love 2 Create:  Anything Goes #18


Blog Archive